Category Archives: Food

SAMSUNG-thumb

More muffin love …

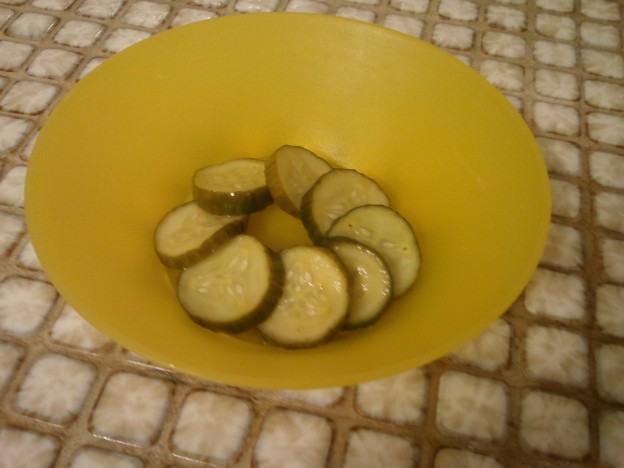
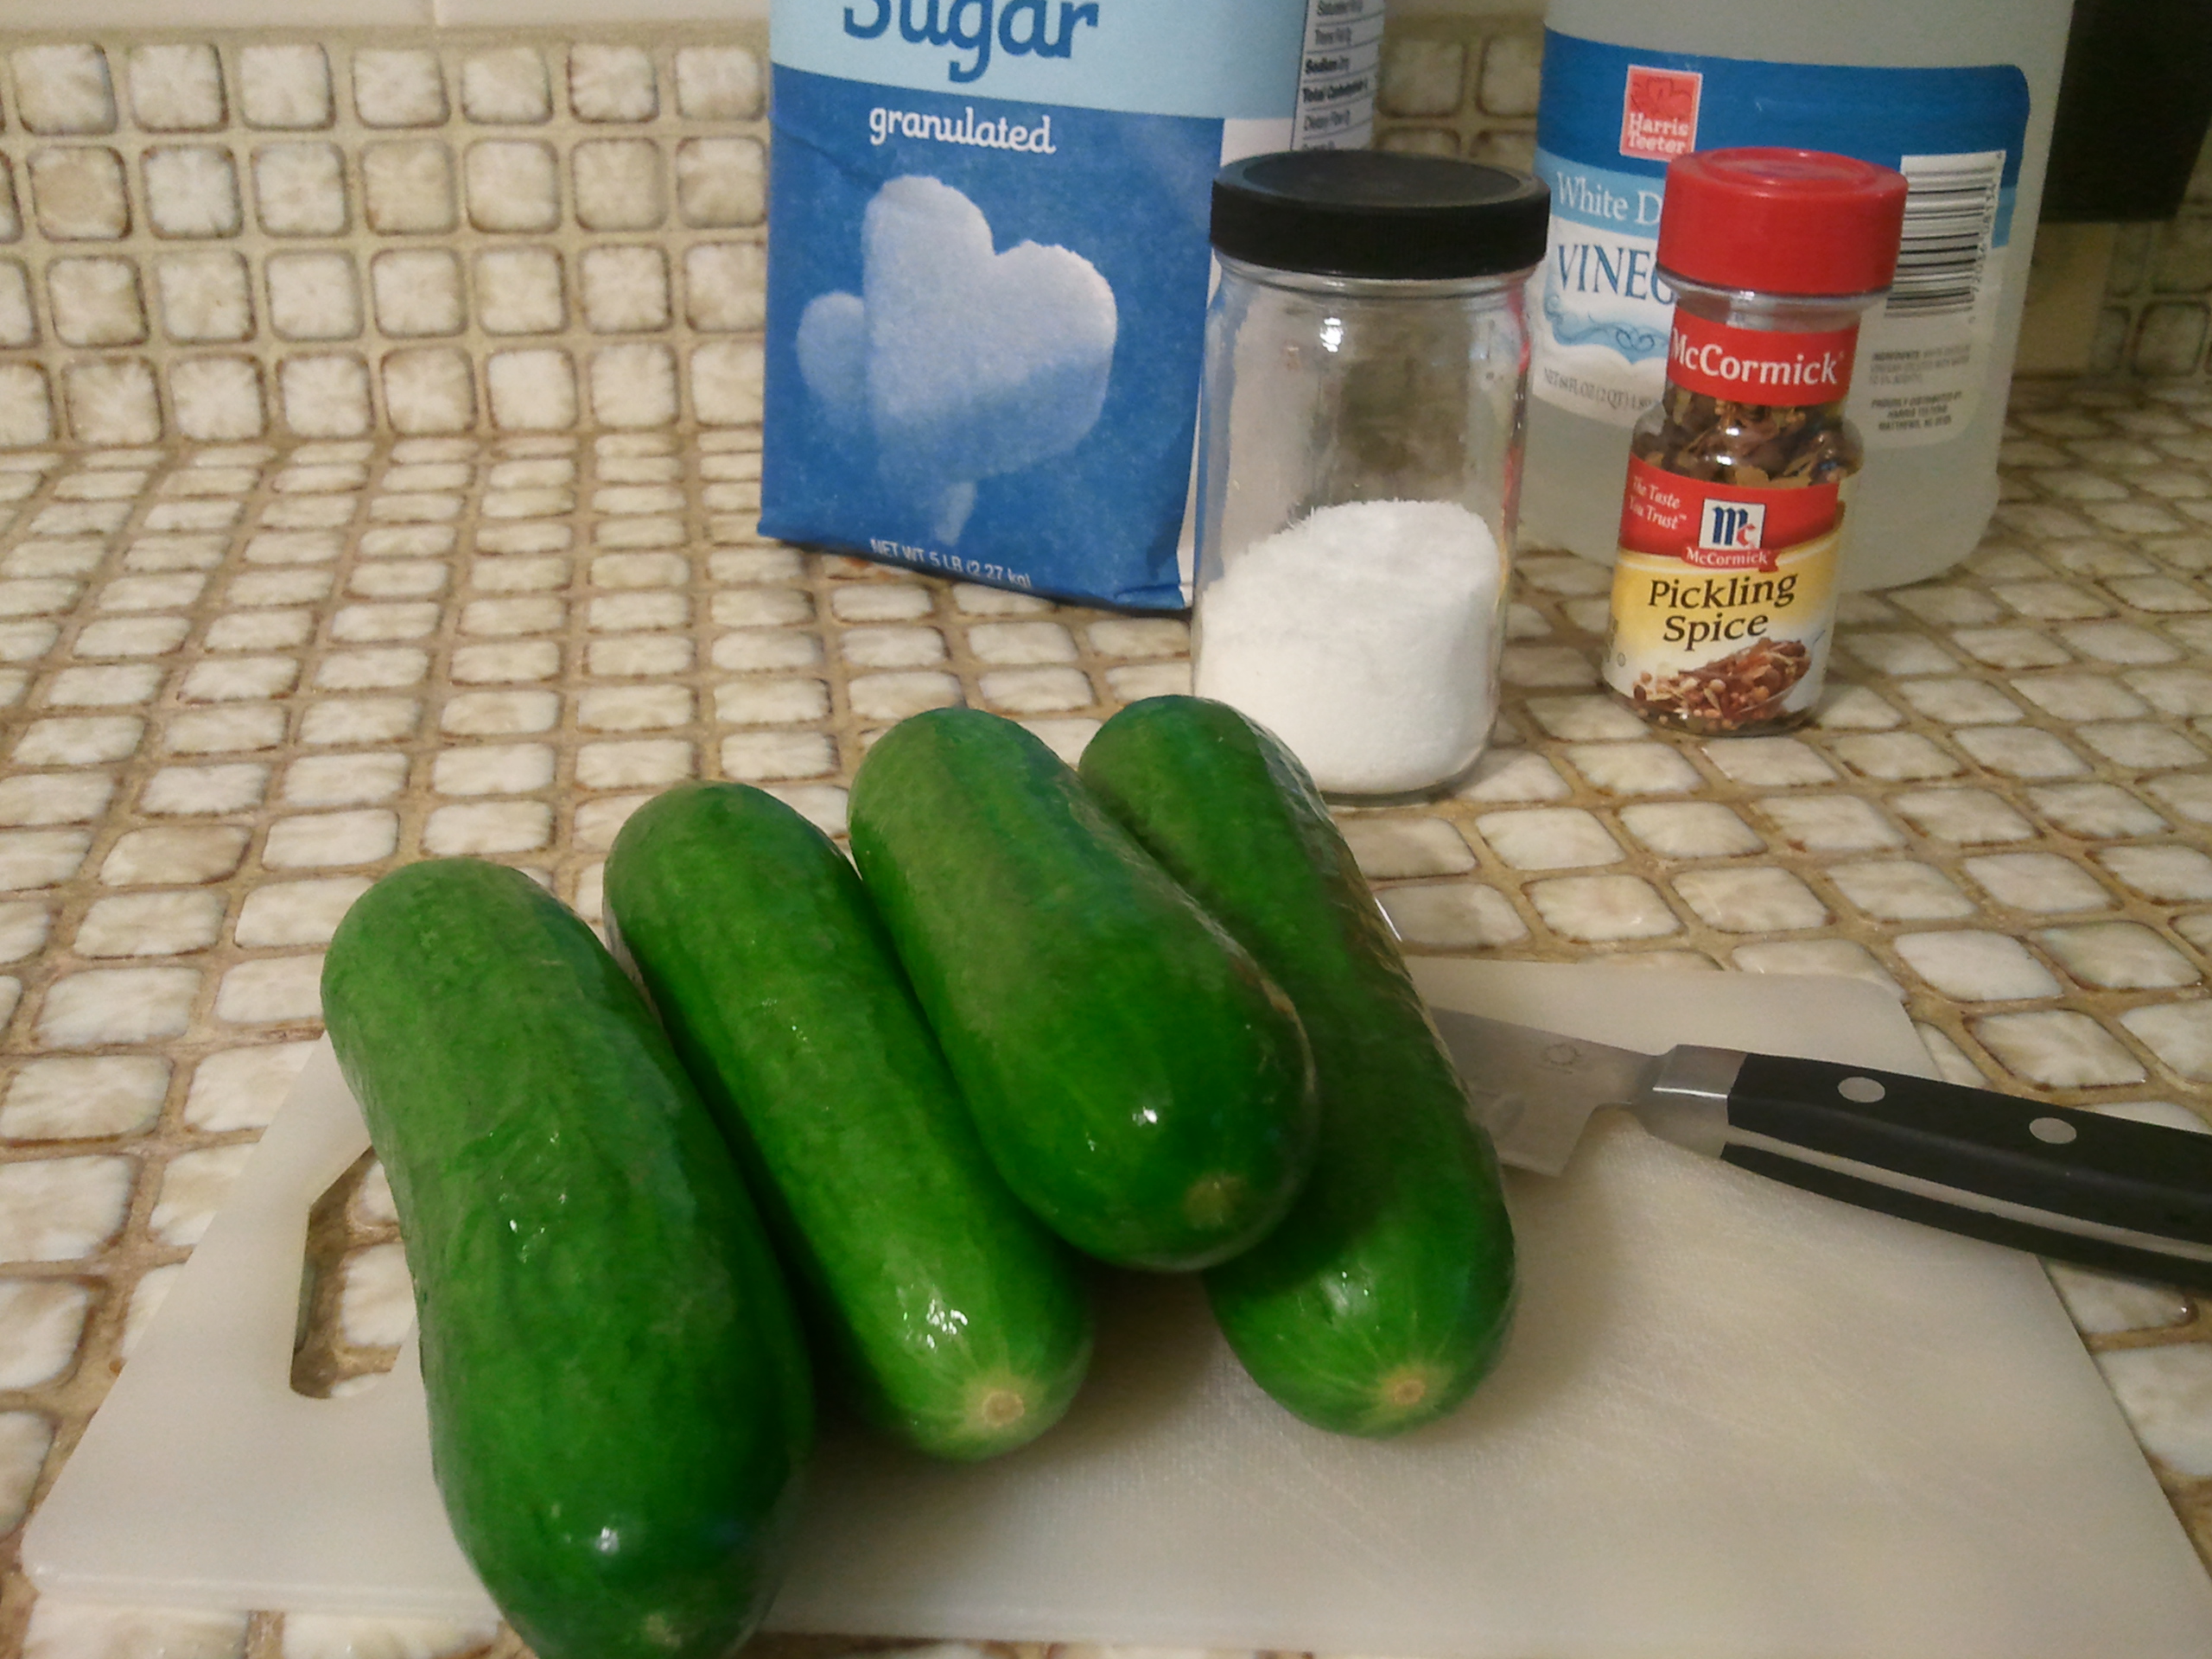
Lately, I’ve been slightly obsessed with reducing kitchen waste and cooking down the freezer (I’m getting MUCH better about labeling those little zipper bags of treasure). Like, I have some frozen oysters and homemade shrimp stock in the freezer, which screams to me gumbo, but then I have to go buy some okra and bell pepper, as well as more shellfish and sausage, and then is that defeating the whole purpose of cooking down the freezer? I dunno … I’m just a walking contradiction I guess.

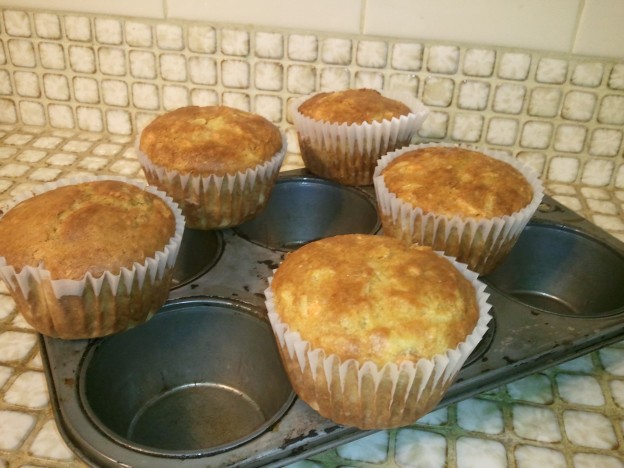
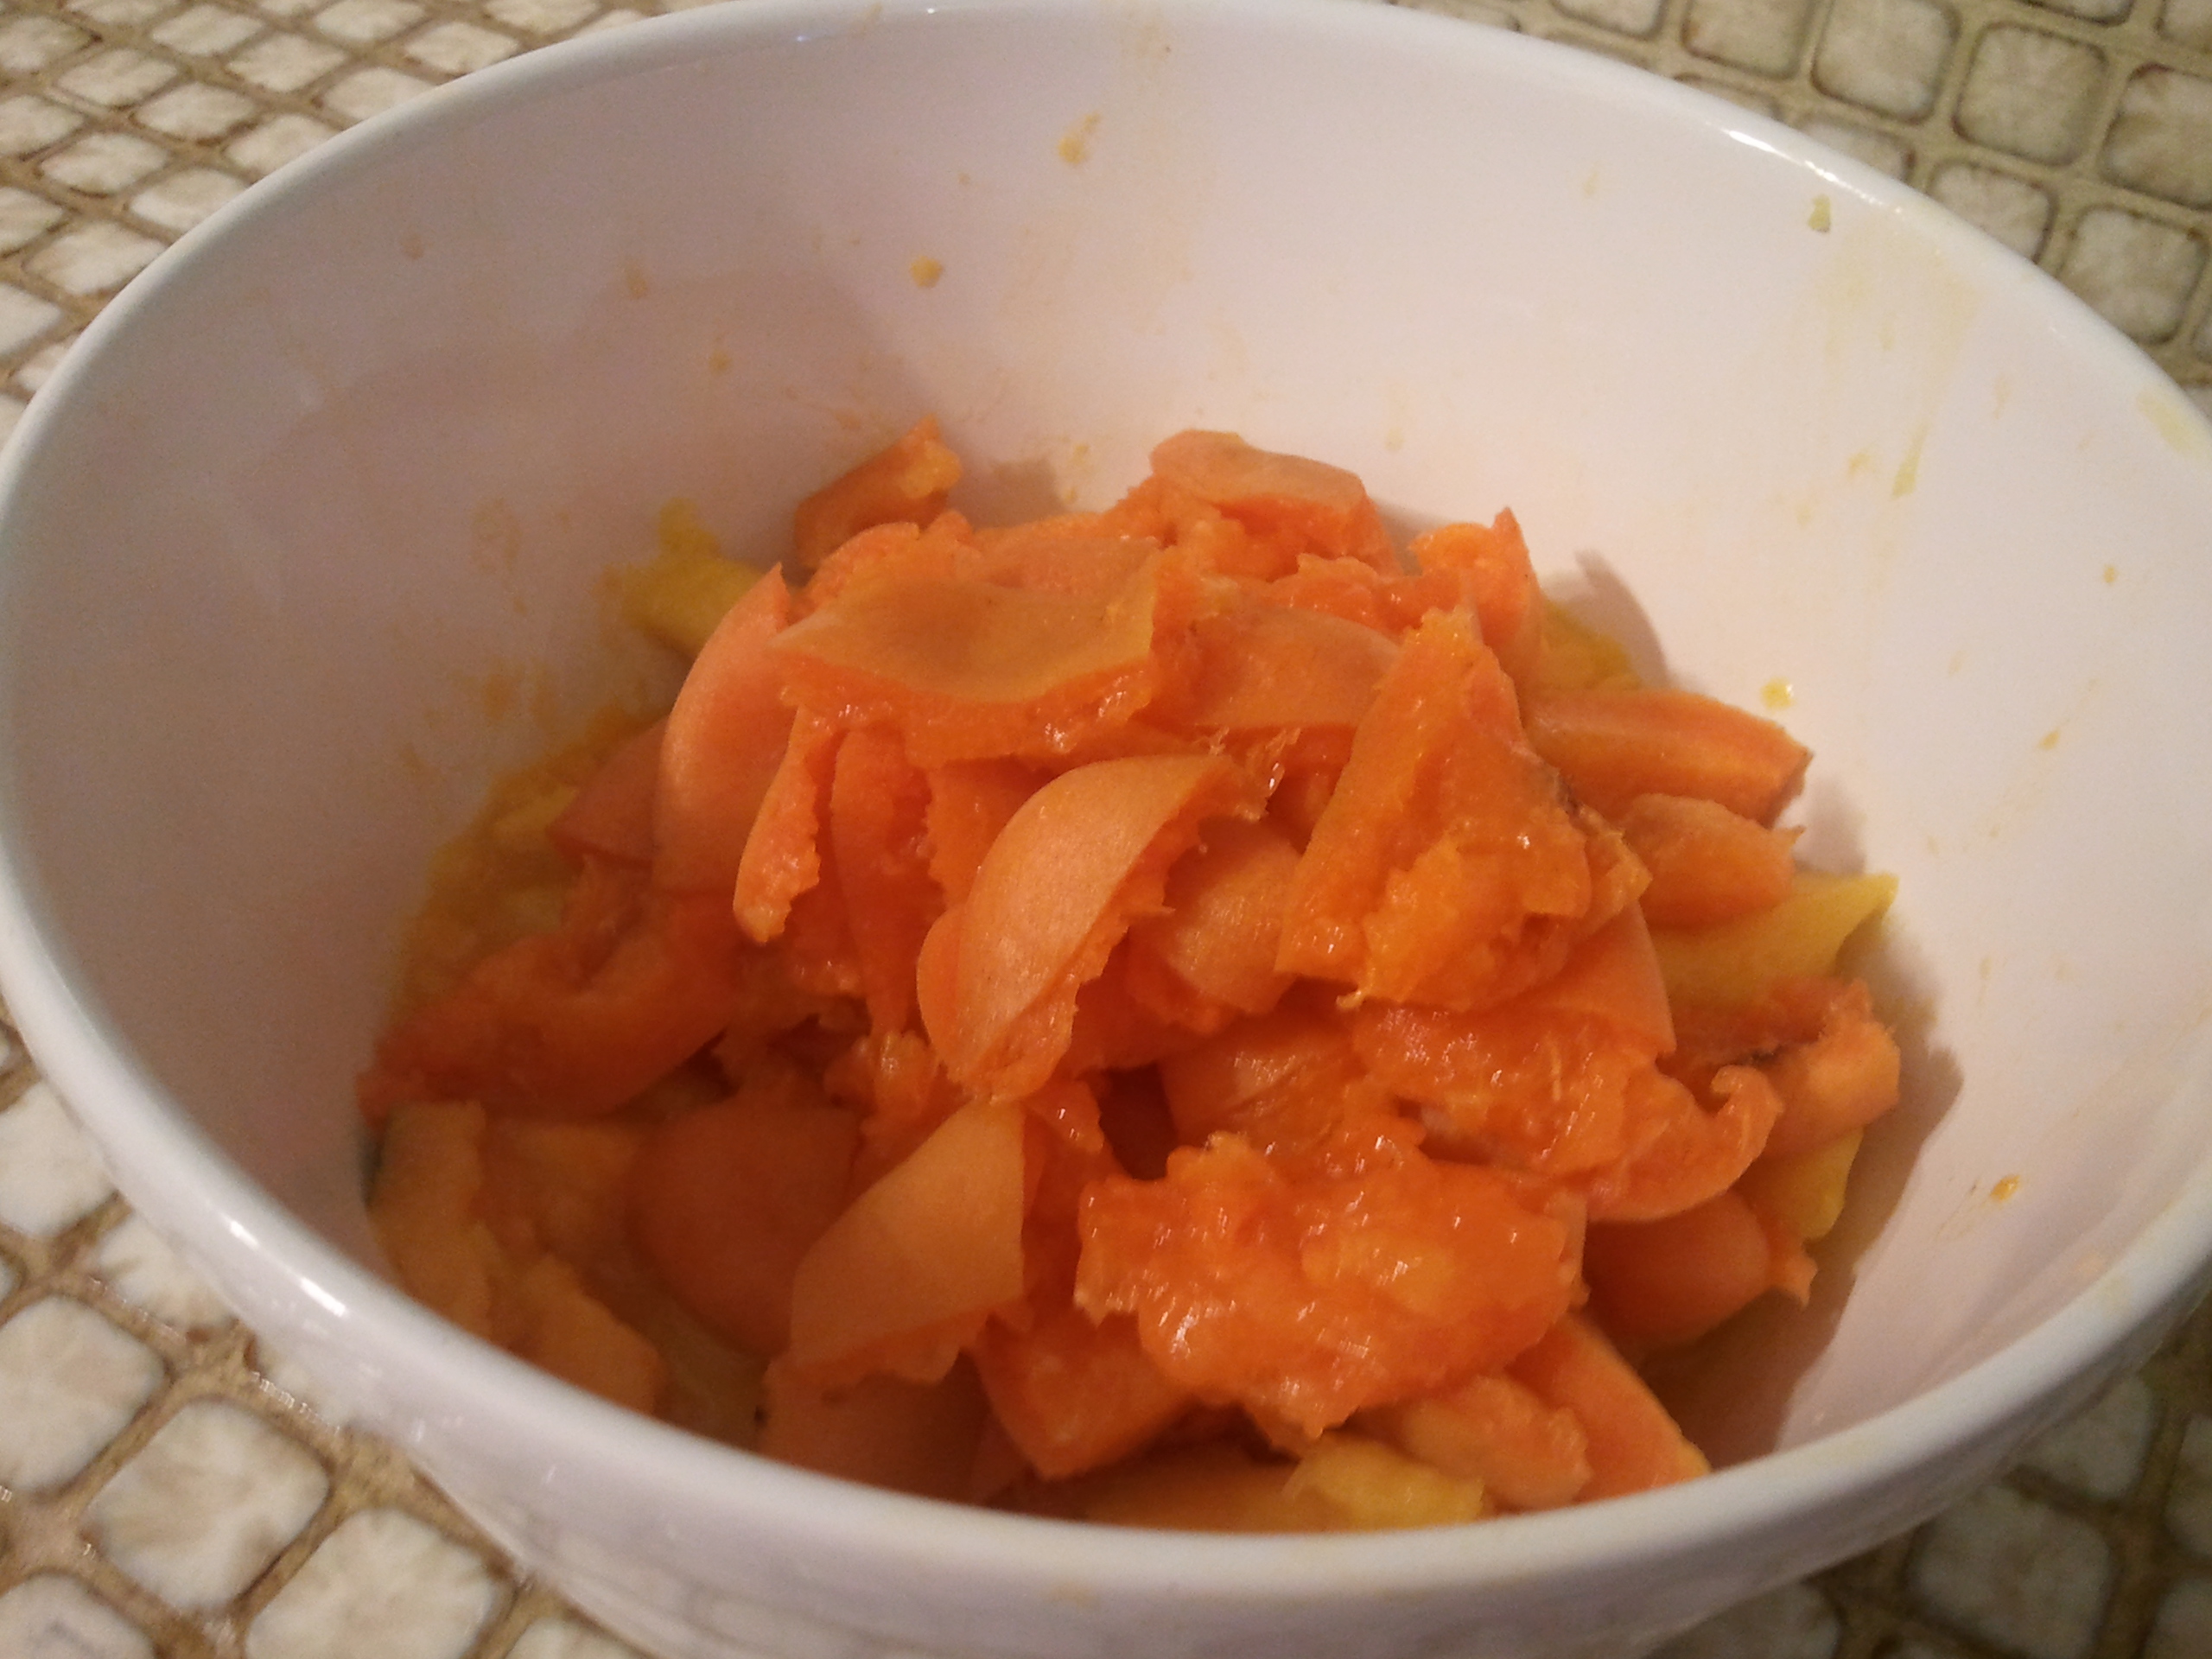
So when I had some crushed pineapple leftover from margaritas, I was looking for a way to use that up in a delicious way. I hadn’t baked in a couple of weeks. Plus my husband’s work-out buddies were coming over and one of them is a HUGE fan of anything I cook, grill, or bake. So I turned to a trusted recipe and mixed it up a bit. I added the carrot for a pop of healthy color (it IS a vegetable after all) and cut back a little on the sugar. It’s a tasty bite, and the coconut adds a nice toothy texture. I think I’ll be making them again soon since I only got one (the boys ate the rest).

Pineapple, Carrot, and Coconut Muffins
Makes six “Texas-sized” muffins

SAMSUNG
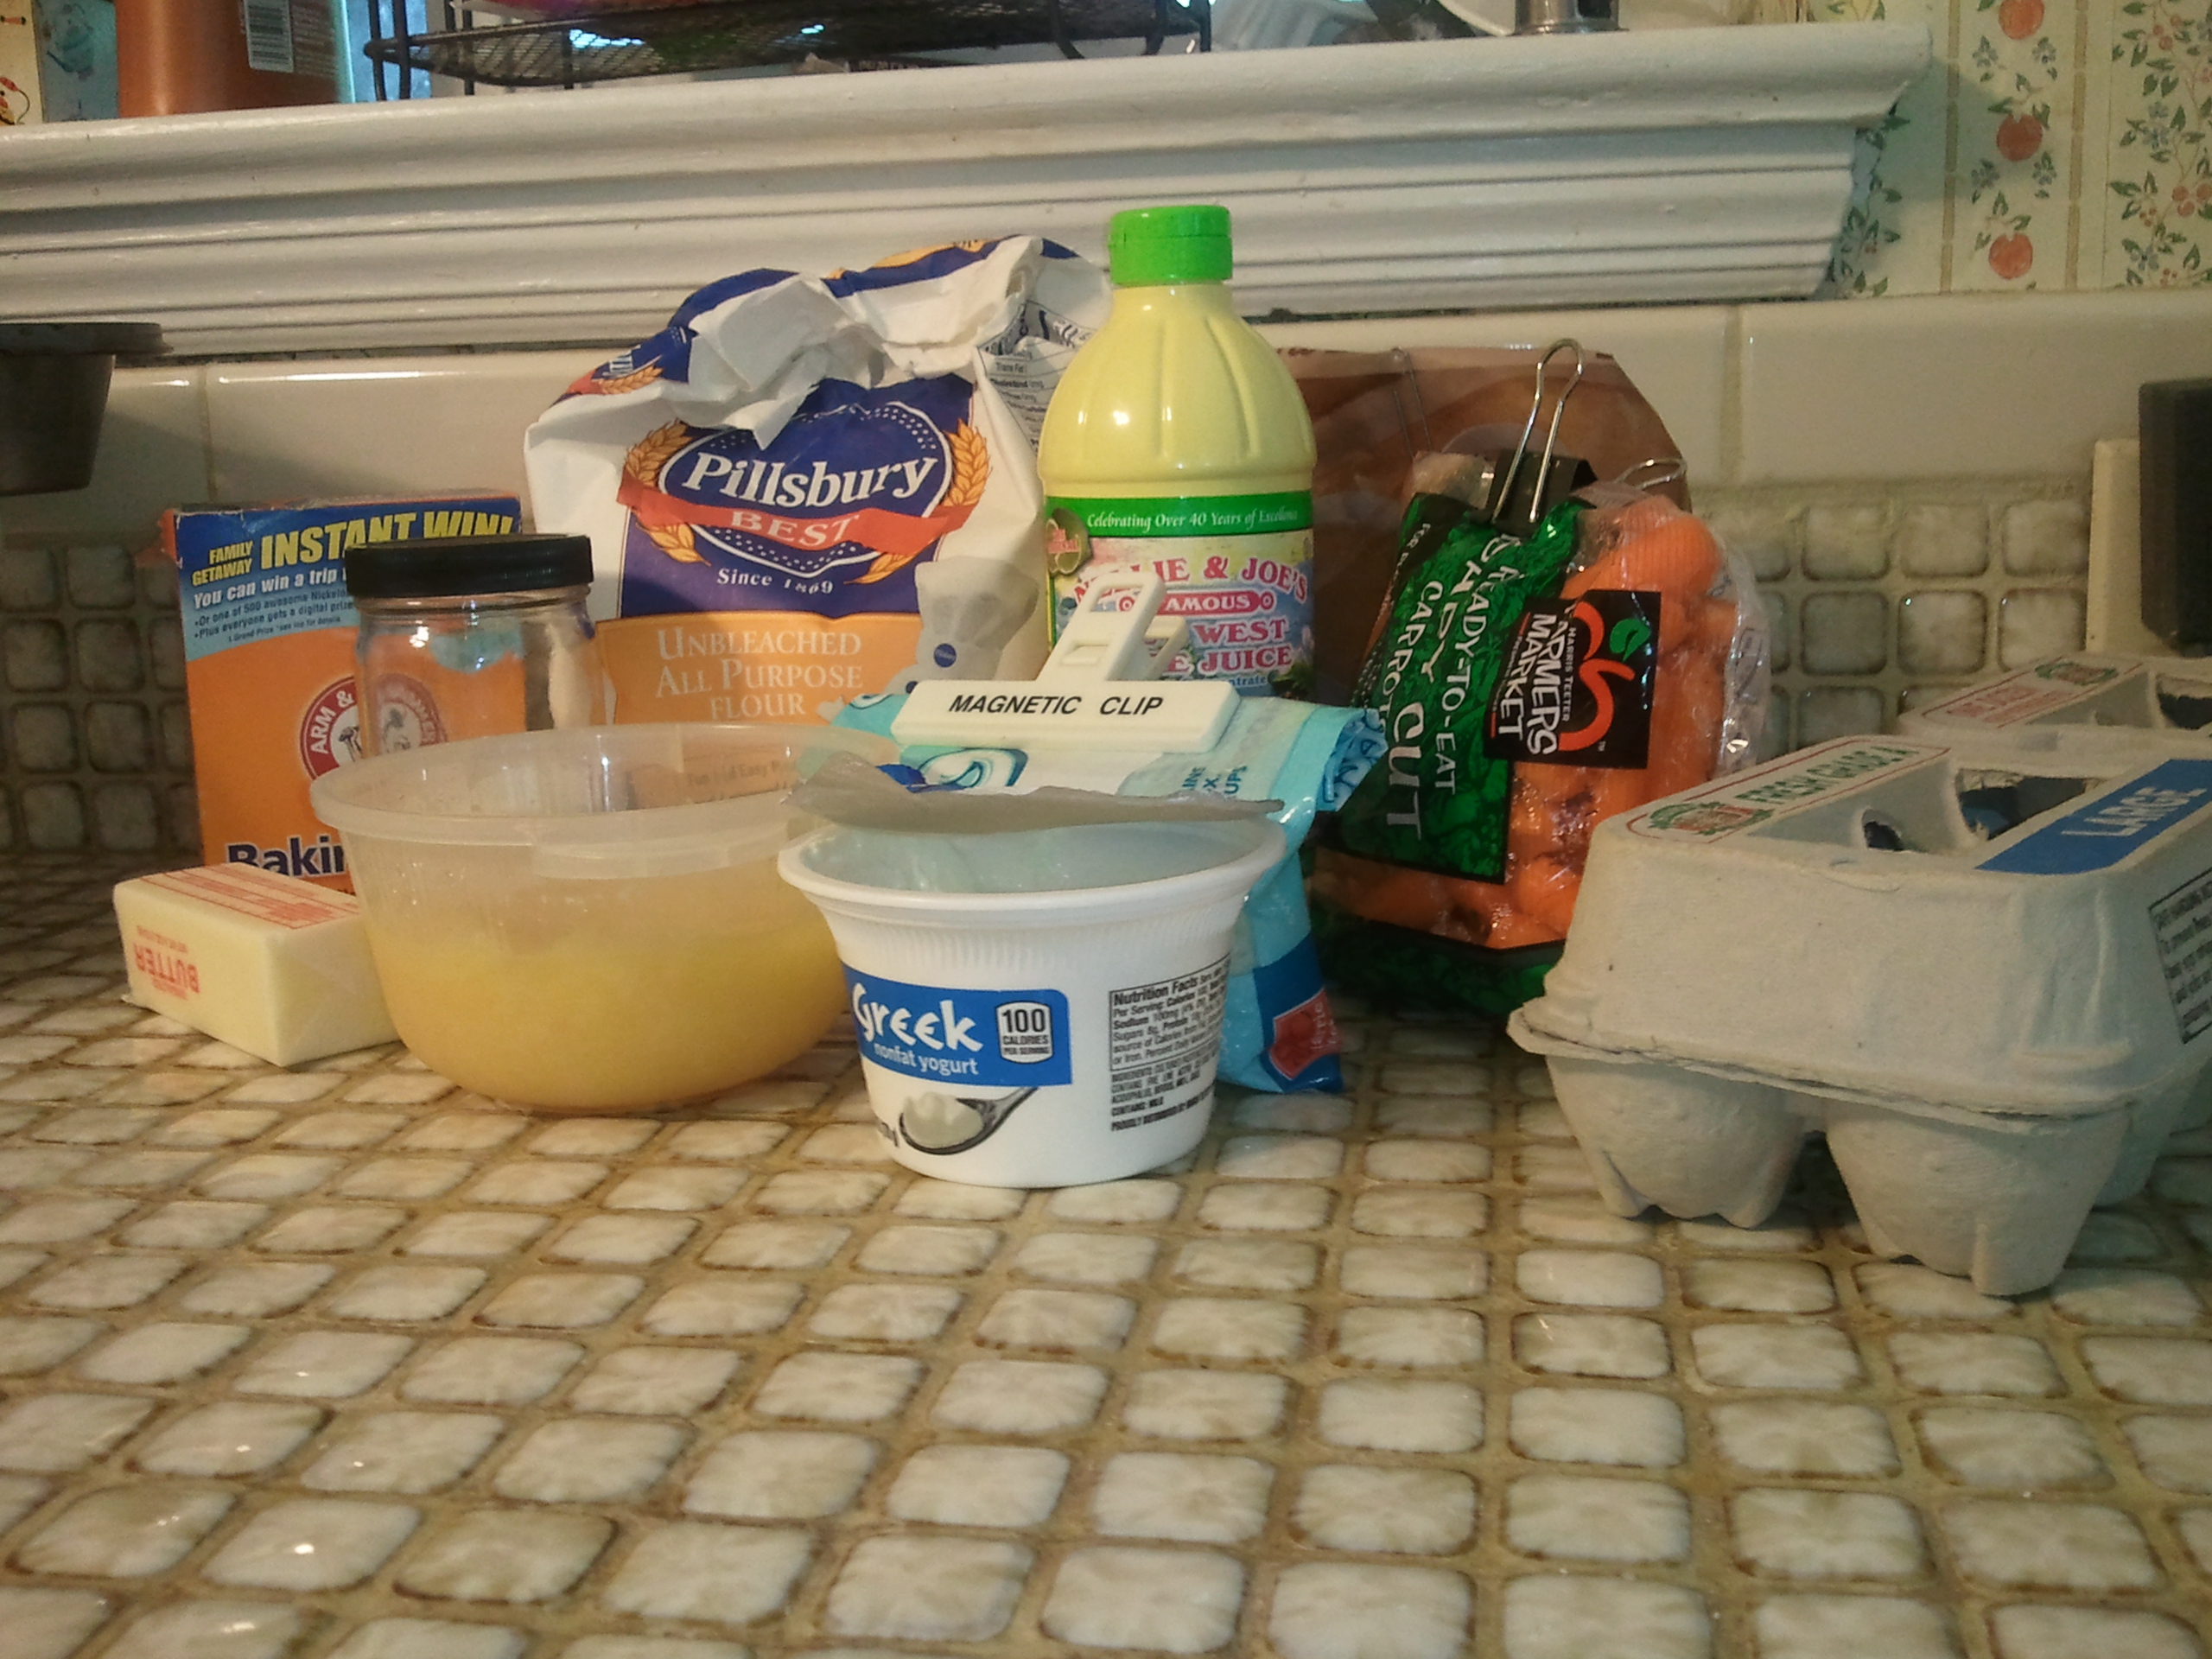
1 1/4 cup unbleached all-purpose flour
1 teaspoon baking soda
1/2 teaspoon salt
5 tablespoons butter, melted and slightly cooled
1/2 cup light brown sugar, packed
1 large egg
1/4 cup plain, nonfat greek yogurt
1 tablespoon lime juice
1/2 cup crushed pineapple, partially drained
1/2 cup finely diced or shredded carrot
1/2 cup sweetened, shredded coconut

Preheat oven to 350°. Line the muffin tin with paper liners, OR, grease them well with solid shortening.

Whisk together the flour, salt and baking soda. Set aside.

In a big bowl, beat or whisk together the brown sugar, butter, egg, yogurt, and lime juice. Add dry ingredients to first mixture and stir just until moistened. Stir in pineapple, carrot, and coconut. The batter will be very thick!

Spoon evenly amongst the muffin wells. Bake at 350° for about 30 minutes, or until a wooden pick or cake tester inserted in center comes out clean. I would check at 25 minutes and then at 3 to 5 minute intervals thereafter.

SAMSUNG

Crazy But Good

So it’s football season again. I get a little obsessed with “tailgate food” right about now. Until I get obsessed with Halloween. In any case, I’ve been dreaming of bacon-wrapped hot dogs. No, I don’t know why, other than I am entranced by bacon ANYTHING. We accidentally candied some bacon last year, which was amazing, so I made some more and threw it into some classic chocolate chip cookies, which were about the best thing ever. But you can’t live on cookies, so I decided to branch out with the bacon.

There’s not much to this recipe — wrap some bacon around some hot dogs (I’d skip the lowfat turkey kind) and grill gently until the bacon is crispy and the hot dog is splitting open. Slap it on a bun and you’ve got some Man Catchin’ Crazy But Good Dawgs. Except I already have a man and do not need anymore, thank you very much.

Bacon Wrapped Hot Dogs on the Grill
SAMSUNGServes 4

16+ wooden toothpicks, soaked for an hour in water
Eight meat hot dogs
Eight slices bacon (the cheap thin kind)
Eight soft potato buns
Selection of mustards, barbecue sauce, or dipping sauces

Wrap a slice of bacon diagonally around each hot dog, securing at each end with a toothpick.

SAMSUNG

Slowly grill over a moderate heat until the bacon fat has rendered off, the bacon is crispy, and the dogs are starting to split open. You may need to move your dogs to the cooler or indirect side of your grill. This may take a while. Drink a beer.

Serve on soft potato rolls with a selection of sauces. The CGP had a smoky barbecue sauce. I went with a sweet Thai chili dipping sauce.

SAMSUNG SAMSUNG

SAMSUNG

Fish Tacos with Pickled Shallots and Jalapeno

I grew up eating ALOT of fried fish. My people are Southern, fish was plentiful and cheap, and frying made a modest mess of catfish go a little further in a hungry family. While I’m more likely to lightly saute or bake fish these days, sometimes, it’s nice to indulge in the crispy-goodness that only frying can provide.

I prefer peanut oil for frying, but I will also use canola. In my opinion, you get better “color” and flavor with the peanut oil. I’m convinced it’s the saturated fats :). Peanut oil is more expensive, so I tend to only buy it when I know I’m going to use it and use it all (I had some go rancid which just chaps me). I always have canola around as a neutral baking and salad oil, so I’m willing sacrifice some color for the cost and convenience factor. I don’t use corn oil — I think it gives an off flavor. Melted Crisco is divine for fried chicken, but again, I just don’t use enough of it in other venues to keep it around much.

So I had some leftover corn tortillas in the fridge and was thinking about tacos. It was still pretty hot, so I was thinking fish over the usual beef. I have had lovely fish tacos with grilled fish, but you know, I wanted the fried kind. I didn’t want to go with a traditional Southern cornmeal batter — I wanted something lighter — so went with a tempura-style batter instead. My secret — use a lemon-lime seltzer rather than plain seltzer or club soda. Adds that little “something something” without overpowering the clean fresh flavor of the fish.

Serve this tempura-style fried fish in crispy corn taco shells with plain greek yogurt and pickled shallots and jalapeno. Cilantro leaves would be a nice garnish as well. And hard to go wrong with an accompanying margarita.

Tempura-Style Battered Fish

Canola oil
3/4 to 1 pound filet of firm white fish, like cod
Kosher salt
Fresh ground black pepper
1/2 cup PLUS 1 cup unbleached all-purpose flour
1 teaspoon baking powder
1 cup lemon-lime seltzer

Pour about 1″ of canola oil into a heavy-bottomed skilled and heat. I set my electric burner just past medium (sorry — didn’t take the oil temperature — but you are aiming for about 350 or so).

Choose a filet that is fairly uniform in thickness – if necessary, cut away the thinner portion near the tail and use for another dish. Salt and pepper the filet on both side, using your fingers to lightly press the seasoning into the fish. Cut the fish into “fingers” roughly the width of the filet’s thickness.

Put 1/2 cup of flour in a shallow dish. This is Dredge Station #1.

Whisk together 1 cup of flour and the baking powder in a medium bowl. Whisk in the seltzer water until the batter is smooth. This is Dredge Station #2.

Once you know your oil is hot — drop a little batter in there and see if it sizzles — take each seasoned fish piece and dredge in the flour, ensuring ALL sides get a light coating of flour. Gently shake off the excess. Then, take each piece and run through the batter, ensuring no dry flour is showing. IMMEDIATELY place the battered piece into the hot oil. Move quickly — you want to get four or five pieces in the oil so they can all come out at the same time. Do NOT overcrowd the pan. Cook until golden brown on the first side, flip over, then cook until golden brown on the second side. Remove to drain on a paper towels. Salt lightly if desired. Continue with small batches until all of the pieces are fried off.

SAMSUNG SAMSUNG

SAMSUNG SAMSUNG

Quick Pickled Shallots and Jalapeno

1 large-ish shallot, sliced thin
1 large-ish jalepeno, sliced thin, most of the seeds and membrane discarded
1/4 cup red wine vinegar
1/4 cup water
1 tablespoon sugar
1 teaspoon salt

Combine the vinegar, water, sugar, and salt in a microwave-safe container (I used my trusty 2-cup Pyrex measuring cup). Bring to a boil — will take just a minute or two. Stir to ensure all the sugar and salt is dissolved — but BE CAREFUL — this is HOT! Carefully transfer the shallots and jalepeno to the brine. Let set at room temperature until cool. Use immediately or refrigerate up to a week (my educated guess — discard if it looks or smell funky — this brine isn’t as acidic or salty as some).

SAMSUNG

SAMSUNG

Easy Weeknight Shrimp Paella

I have a fabulous paella recipe that takes ME about 2 hours to make. There are 3 kinds of meat to be cooked off sequentially (bacon, chorizo, and bone-in chicken thighs), shellfish to be cleaned/prepped (shrimp, clams, mussels, squid), plus aromatics and vegetables to mince/chop/slice (garlic, shallot, onion, red peppers, peas). I think there might be some wine in there somewhere too. Eventually it all goes in giant roasting pan (I don’t have a proper paella pan) to cook off in the oven. The end result is amazing and perfect for a crowd, especially in cool weather, but quite the production for me to pull off. I only psych myself up for it about once a year.

Last winter, I stumbled on a couple of less-complicated vegetarian paella recipes in the Washington Post. Unlike my more traditional recipe, these kick-start the cooking on the stovetop and then finish off in the oven, AND, they had far fewer ingredients and were for a much smaller portion-size (they were part of a “Cooking for One” column). I ended up doubling the rice and stock and added shrimp, aiming to feed two hungry omnivores.


Weeknight Shrimp Paella
Inspired by recipes published Dec 2012 in the Washington Post
Serves 2- 3 as a meal, 4 – 6 as a first course

1 pound shrimp, peeled, be-headed, deveined (Save the shells! See note below)
2 cups homemade shrimp stock or store-bought low-sodium chicken brothSAMSUNG
Pinch of saffron
Kosher or sea salt
1 teaspoon extra-virgin olive oil
3 slices bacon, cut into 1/2″ pieces
1 large shallot, thinly sliced
2/3 cup Arborio rice (uncooked)
1/3 cup frozen peas
1 roasted red pepper, cut into thin strips
Shredded parmesan cheese

Put the stock and the saffron in a 2-cup Pyrex measuring cup and heat in the microwave until steaming but not boiling. Season with salt to taste (go easy, there’s bacon and shrimp to come).

Put the olive oil and bacon pieces into a warm oven-proof 10″ skillet and bring slowly up to medium. Cook the bacon until it is crispy and the fat rendered off. Use a slotted spoon to remove the bacon and put it on a paper towel to drain.

Preheat your oven to 400F.

SAMSUNG


Add the shallots to the fat and cook until soft. Add the rice and stir to ensure each grain is coated with fat. Add the hot stock and simmer gently, stirring occasionally, until most but not ALL of the stock is absorbed, maybe 6 to 10 minutes (it should look soupy).


SAMSUNG

Add the peas and pull from the stovetop. Arrange your shrimp over the top of the rice — nestling them slightly into the rice. Arrange the pepper strips across/between the shrimp. Put the pan into the oven and cook until the shrimp are done and the rice has absorbed all the liquid, probably 6 to 10 minutes.


Pull from the oven and let sit on the counter for about five minutes to rest. Scoop into bowls and garnish with the reserved, crumbled bacon or parmesan cheese (or both)!

SAMSUNG SAMSUNG

We drank prosecco with a splash of creme de cassis (’cause it’s such a pretty color!).

*****

Note: I buy frozen shrimp, 21/25 count (a versatile bite-size), in a 2-lb bag for $9.99 or $10.99, on sale. I usually use half a bag at a time — just close up the remainder really tight and use another time. They have been beheaded and deveined, but I have to peel. Throw the peel in a saucepan with a bay leaf and a few peppercorns and add water just to cover the shells. Heat over medium heat to a gentle simmer, turn down, and let it cook for 15 minutes or so. The shells will turn pink and the stock will turn a rich golden color. Let cool in the saucepan, then strain. I usually add a touch of water to bring it to a 2-cup or 3-cup total volume, then freeze in 1-cup or 2-cup portions. I don’t add salt — the shells contribute some — and I’d rather salt the final dish than the stock. I use this stock in risotto, paella, and gumbo. Should keep about 6 months in the freezer.

SAMSUNG SAMSUNG

SAMSUNG

A new “toy” for the kitchen!

I know Tuesday’s are normally a beverage posting, but I got a new kitchen appliance over the weekend and I just wanted to share my first successes with it!

I’ve always been a minimalist, small appliance-wise. I have always had tiny kitchens with hardly any storage or counter-top space. And I don’t like clutter on my counter-tops. The coffeepot always has a place (I don’t function without my morning hit), and well, you have to tuck the microwave somewhere because it’s too heavy to put away every day. I’ve got a toaster (can be put away), a mini-chopper (can be put away), and a hand mixer (can be put away). Last fall, I finally splurged on a full-size Kitchen-Aid stand mixer after YEARS of deliberation. It sits on the counter and as it turns out — it doesn’t really get in the way. Also, with it out, I’m more likely to use it!

I have struggled with pie crust for 30+ years. My mother and grandmothers made amazing pie crusts, so this feels like a personal failing. Yes, they made them by hand. In un-air-conditioned kitchens. With oil. After reading a zillion cookbooks and watching a million cooking shows and consulting personally with known pie crust masters, it really comes down to, I needed a food processor. So this weekend, I made the MOMENTOUS decision to go buy one. The bread machine has been relegated to the beach house and the food processor has taken it’s place. I am so psyched!

So what was the first thing I made? PIE of course! I made these little sweet potato handpies with an all-butter dough. The dough was tender and flaky — if a little thick (that’s a rolling issue not a recipe issue). It was an amazing first attempt at dough in the food processor! I have a second disc in the fridge waiting to be turned into something else, maybe a free form apple pie.

The other thing I made was pimento-and-cheese dip. I am lazy, so I usually buy cheese pre-shredded in bags. But for this dip, I knew I didn’t want the cornstarch-coating that pre-shredded cheese tends to have — I needed to shred myself. Guess what a food processor has — shredding discs! So I shredded up my cheddar and pepper jack like a champ! The dip rocks — so much better than anything I’ve bought at the store. It was hard not to eat it all right after making it! I’ll do a full post on this dip later — it is truly blogworthy :)

SAMSUNG

Dessert from the grill …

I think the heat wave finally broke, but it still seemed too hot to cook. We were having guests over this weekend so Keith threw a small (6 lb) Boston Butt on the grill for a 9-hour smoke into pulled-pork-palooza. I steamed some yellow and green squash and heated up some (canned) baked beans, so the stove got used a bit but not much. Frozen pineapple margaritas for the big people and mango limeade for the little people. For dessert, he and a munchkin had hit the farmer’s market and brought home mangoes and apricots, so I had the base for a fruit crisp, if not the fortitude to actually turn on the oven.

Recently I ran across a Heather Christos post for a Peach Coconut Almond Cobbler that looked divine. Taking her flavor profiles as inspiration, I assembled a MUCH more rustic crisp that we “baked” on the grill after the meat was pulled and we were eating dinner. I think we all agreed it was a hit!

SAMSUNG SAMSUNG SAMSUNG

Tropical Fruit Crisp

3 mangoes, peeled and cut into rough chunks (pits discarded)
8 – 10 apricots, washed and cut into rough chunks (pits discarded)
1 heaping tablespoon cornstarch
2 tablespoons granulated sugar
1 teaspoon “baking” spice mix
1/2 – 2/3 cup unbleached all-purpose flour
3 – 4 tablespoons cold butter, cut into 1/2″ chunks
1/2 – 2/3 cup oats
2 tablespoons brown sugar (to taste)
1/4 cup sliced almonds
1/4 cup dried, sweetened coconut

Prepare a 7″ x 11″ pan by spraying liberally with baking spray.

Mix the fruit, cornstarch, granulated sugar, and “baking” spice mix in a large bowl. Spread in the prepared baking pan.

SAMSUNGPut the flour in a wide shallow bowl, like a soup bowl. Use your fingers to smear the butter into the flour until it is pea-sized (you aren’t going for “sand” like you would for biscuits). Put that in a large bowl and lightly toss with the oats, brown sugar, almonds, and coconut. Spread this over the fruit. Put on your grill (or in your oven) until the fruit is bubbling frantically at the edges and the topping is lightly browned (our grill was at ~ 300F for probably 40 minutes or so). I ran mine under the broiler for like 2 minutes just to add a touch more color. Serve with vanilla ice cream.

*****

SAMSUNG


I put the Trader Joe’s Ice Cream in this photo because it was a TRUE half-gallon container! Has anyone else noticed the ice cream containers shrinking?

SAMSUNG

Quick Refrigerator Pickles

I stopped at a farm stand on the way to work this week, and they had the cutest little baby “middle eastern” cucumbers. Cute as can be. I asked about their potential future as a pickle, and the farmstress said the skins were SOOO tender and they’d probably make a fine pickle! So I grabbed five (four for pickling and one for fresh) and took them home with intention to pickle ’em.

I don’t can, in the sense of hot water and headroom and sterilized jars. My grandmothers did. My mother has. I’m just a little intimidated by the whole botulism risk I think. And the heat. In the middle of summer. And the steam. I need an ice tea already!

Quick refrigerator pickles, though, are a totally different story. I’ve done them in the past (can’t find the recipe of course) and there are 1000s of recipes out on the internet. I’ve also done pickled shallots with much success (on a spicy lamb burger with greek yogurt OMG sounds like another blog post, eh?), but I was aiming for something sweeter, more like a bread-and-butter pickle, but without the jaw achingly sweetness. This brine struck that balance … sweet, but not too sweet … sour, but not too sour … salty, but not too salty!

I started these off in the morning before work and had serviceable pickles for dinner. They continued to percolate and mellow over the next day or so. Use within about 3 weeks I’m guessing.

SAMSUNG SAMSUNG SAMSUNG

Quick Refrigerator Sweet Pickles

4-6 very firm smallish cucumbers
2 cups distilled white vinegar
1 cup sugar
1 tablespoon kosher salt
2 tablespoons pickling spice (bay, pepper, mustard, …)

Slice your cucumber into rounds about 1/4″ thick. Place them in a large heat-proof glass bowl.

SAMSUNG
Combine the vinegar, sugar, salt, and pickling spice in a small saucepan and bring to a boil. Pour the brine over the cucumber slices and stir to ensure all the slices are submerged. Cover. Allow to cool on the countertop. Refrigerate. Keep refrigerated under cover for up to 3 weeks. Discard if you start to get off smells or colors!


I especially like them with peanut-butter-filled pretzels. Peanut butter and pickles are a match made in heaven. You know, I bet these would taste amazing deep-fried! Hmmmm … do I sense yet another post coming up ?

SAMSUNG

[photo: Casey Tantum]

Guest Post: Oreo Cookies and Cream Cake

[photo: Casey Tantum]

Julie says: If preference towards a type of food has anything to do with the perceived age and maturity level of an individual, then consider me a nine year old.  Funfetti is my cake flavor of choice, and I consider ice cream to be a major food group of its own, right there on the pyramid between dairy and protein.  With this said, you must understand the overwhelming feeling of excitement I experienced when I came across a recipe for a cake which not only looks like an Oreo, but tastes like an Oreo at the same time.  Dreams really can come true.

With that being said, when a coworker’s birthday just so happened to come the same week as the birth of the Royal Baby, this called for a celebration… and an excuse for me to make one of my favorite treats.  Besides, what screams royalty more than a cake made out of Oreos?

Now allow me first to read your mind and answer all of your questions ahead of time:

Q: It’s still beach season and I’m allergic to fun.  Is this cake healthy?
A: This cake is quite healthy, providing you with your daily dose of both Vitamin sugar and Vitamin whipped cream.

Q: Will I still be able to dunk my Oreo cake in a glass of milk?
A: An Oreo Cake, unlike your typical Oreo cookie, is too large to dunk into a standard milk glass, so cake dunking is not recommended.  However, the cake is quite rich so I would suggest having a glass of milk nearby.

Oreo Cookies and Cream Cake
Courtesy of Julie Giffin (Julie.Giffin@gmail.com)

1 Box white cake mix
Eggs, water and oil as called for on the box
15 Oreos, crushed

1 8-ounce package cream cheese, softened
1 16-ounce box powdered sugar
1 8-ounce container Cool whip, room temperature
15 Oreos, crushed
1/4 teaspoon pure vanilla extract

Cake: Grease and flour two 8″ pans.  Prepare cake batter according to package directions (or your own recipe) and set aside.  Put 15 Oreos into a Ziploc bag and smash yourself into oblivion until you have a bag of delicious chocolately crumbs. Stir the crushed Oreos into the batter before dividing between the two prepared pans.  Bake as directed on box or in recipe.  Remove cake layers from oven and allow to cool completely on cooling rack.

Frosting: In mixer, cream the cream cheese and sugar. Add vanilla, mix well, and stir in Cool whip by hand (do not beat it in or your frosting will turn out runny). Mix well. Fold in the remaining 15 crushed Oreos until well blended.  Keep in mind that you’ll have a fairly lumpy icing, but it adds to the fun. Frost cooled cake and refrigerate cake until ready to serve and refrigerate any leftovers.

Chef’s Secret: Use remaining Oreos to decorate the top of the cake by splitting in half and arranging on the top of the cake, chocolate side facing up.  OR you could always eat them.  The cake is beautiful on its own and you deserve it.

SAMSUNG

 *****

Michelle says: Now, I make a decent cake/cupcake myself, so I can be a little jaded. And picky. But this cake just blew my skirt up — it really is THAT good. So of course I begged her to write a guest blog and reveal her secret recipe!

SAMSUNG

Pork-Palooza

I’m going to caveat upfront — this post really doesn’t contain a recipe. Because smoking a pork butt (the butt of the shoulder) is a PROCESS. But if you have 8 – 10 hours to hang out some weekend afternoon, you WILL be rewarded with sweet porky goodness at the end, with plenty to share.

In our house, all good barbecue starts with a rub. There are many fine commercial rubs. Penzey’s makes several and Nick’s makes a good one. So we’ve always got some around, but we do find they tend a little saltier than we like. So most of the time, we make our own. I don’t have exact proportions, but the basic rub for our pork tends to contain, in roughly descending quantities:

  • SAMSUNGBrown sugar (light and/or dark, depending on what’s in the house)
  • Smoked Spanish Paprika
  • Salt
  • Ground black pepper
  • Garlic Powder
  • Onion Powder
  • Ground cumin
  • Ground Chipotle or Cayenne

SAMSUNG


Taste it for balance. Sweet should be at the forefront, with a hint of salt and smoky. Should finish a little spicy from the hot peppers. You can always cut it with a little more brown sugar or paprika if the salt or heat is too dominant.


SAMSUNG

Don’t worry if you make more than you think you need — as long as you don’t cross-contaminate with the raw meat, it will keep for a while in an airtight container. If you accidentally cross-contaminate (you know, stick your porky hand IN the container), then either use it all or toss it out. Don’t even THINK about saving it, even in the fridge, for another time.


We like to apply the rub to our butt (stop giggling!!) the night before. Cover with foil and refrigerate overnight. Just for reference, this was about 7 pounds. Here’s the befores (11pm) and after (9a):

SAMSUNG SAMSUNG SAMSUNG

The next morning, Keith configured our Big Green Egg for indirect grilling with a plate setter, aiming for 225F to 250F. We put the meat on around 9a. Don’t waste the juicy stuff in the bottom of the night pan — pour that over your butt!

SAMSUNGSo now you get to sit around and watch the ballgame. Maybe do a little shopping on Amazon. Mow the lawn. About once an hour, take a peek at your dome temperature, adjusting your upper and lower vents as needed to keep it between 225 and 250. Ours sat around 250 for most of the smoke. There is NO reason to open the lid of the smoker!!

SAMSUNG


Around 4pm, Keith transferred the meat to a disposable aluminum pan. He added about 1″ of apple juice to that pan, covered it all with foil, and returned it to the grill at the same 225F – 250F. This is called “wrapping” and ALL the competition barbecue people do it!


We are converts to wrapping for the last 1/2 or 1/3 of the cooktime. We do it with our brisket and we do it with our ribs. It keeps you from over-smoking your meat, it lets you get a little moisture or flavor on the meat with no risk of burning, and it cuts the cooktime down because the meat is almost “braising” or “steaming” at the end. Downside — your bark might soften up some, but if you get good color/carmelization on there early on, you’ll be fine.

Around 6:30p, we checked the internal temperature. Right at 200. We like to take pork butt to 195F – 200F, so we probably coulda pulled it at 6p, but Keith was still mowing the lawn (pork butt is pretty forgiving, especially if wrapped). We pulled the meat, let it rest about 15 minutes, then started pulling:

SAMSUNG SAMSUNG SAMSUNG

We like to serve it on soft potato rolls with a selection of barbecue sauces. Right now we are obsessed with two from Harris Teeter — a mustard based and a vinegar based. Don’t forget one of my fabulous frozen margaritas!

SAMSUNG

Sometimes You Feel Like a Nut!

My all-time favorite cookie is the classic Toll House Chocolate Chip Cookie. Real butter, real eggs, Nestle semi-sweet morsels. Nuts optional. It’s the cookie of my childhood and my go-to cookie today. I’ll experiment with the mix-ins, maybe bake as bars rather than individual cookies (awfully cute in a heart-shaped cake pan), but sometimes I just want that classic favorite.

So one of my Facebook friends shared a link to Handle the Heat, where the blogger took the classic Toll House Chocolate Chip Cookie recipe as a “control recipe” and then made a series of batches where she tweaked a single element in the recipe, LIKE A SCIENCE EXPERIMENT, to see what happened. I was totally enthralled by the post! Two changes that caught my eye were the use of equal parts baking powder and and baking soda (rather than just baking soda) and the use of melted butter (rather than butter softened to cool room temperature).

Independently, I’ve been thinking about a “Almond Joy” cookie — something with chocolate, almonds, and coconut (duh). But I didn’t want to just throw these into a blonde cookie base. I’ve got some recipes for a chocolate cookie base, but most called for melting baking chocolate or chocolate chips — just too fussy. I have a tasty mocha cookie base that’s based on the Toll House recipe — but it’s not as chocolatey as I imagined for this cookie. So, taking a little inspiration from Tessa, I tweaked this classic cookie base and got the chocolatey depth I wanted, the crisp edges I adore, and a moist center chockfull of coconut and almond chewiness.

Sometimes You Feel Like a Nut Cookies
Makes about 2 dozen cookies

SAMSUNG1 stick unsalted butter, melted and cooled to room temperature
1 cup plus 2 tablespoons unbleached all-purpose flour
1/2 teaspoon baking soda
1/2 teaspoon salt
1/4 cup unsweetened baking cocoa
1/4 cup plus 2 tablespoons granulated sugar
1/4 cup plus 2 tablespoons packed brown sugar
1 teaspoon vanilla
1 large egg
1 cup rough-chopped dark chocolate (or semi-sweet chocolate chips)
1/2 cup sliced almonds
1/2 cup sweetened shredded coconut

Preheat oven to 375F. Line two baking sheets with parchment paper.

Gently melt the butter. I like to use a 2-cup Pyrex cup in the microwave: 30 seconds @ 50% power, swirl, 20 seconds @ 40% power, remove. Allow to cool to room temperature.

Whisk together the flour, baking soda, salt, and cocoa in a medium bowl. Set aside.

Pour the butter over the sugars in the bowl of a stand mixer fitted with the paddle attachment. Beat on low for about a minute. Scrape the paddle and sides, then let the butter and sugar hang out for about five minutes to better dissolve. Then, beat on medium-low for a couple of minutes until fully mixed. [NOTE: You could probably do this by hand with a wooden spoon and good arm muscles]

Add the egg, mix until fully incorporated. Add the vanilla, mix until fully incorporated.

Add the dry ingredients slowly with mixer on low (I added in three increments), scraping frequently. Don’t overmix! Add the chocolate, almonds, and coconut. Mix with the mixer about 3 rotations of the bowl — then stop and finish by hand.

SAMSUNGUse a cookie scoop (mine is a generous tablespoon — probably about four teaspoons) to place eight scoops on a parchment-line cookie sheet. You need some room for spread. Put ONE cookie sheet in the oven, cook 6 minutes (set the timer!), rotate the pan, and cook for another 3 to 4 minutes.


SAMSUNGPull when the cookies look a bit underdone — there will be carryover cooking as you allow them to cool on the cookie sheet before moving to waxed paper on your countertop to fully cool.

I got 27 cookies out of this recipe, even permitting the cook a few bites of dough (raw egg be damned!).


Serve with ice cold milk, of course!

SAMSUNG SAMSUNG SAMSUNG