Monthly Archives: August 2013

SAMSUNG

Quick Refrigerator Pickles

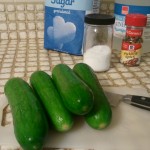
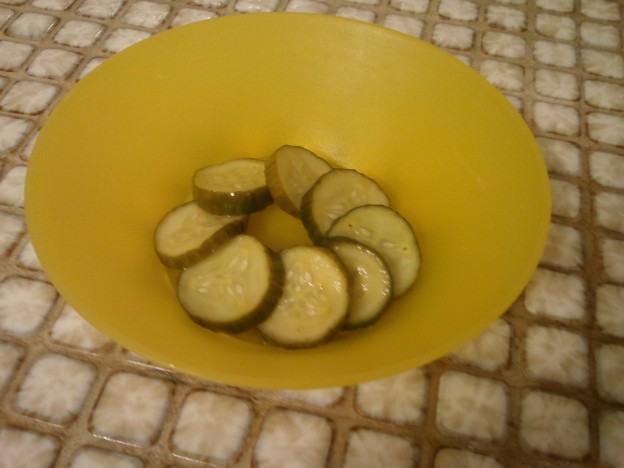
I stopped at a farm stand on the way to work this week, and they had the cutest little baby “middle eastern” cucumbers. Cute as can be. I asked about their potential future as a pickle, and the farmstress said the skins were SOOO tender and they’d probably make a fine pickle! So I grabbed five (four for pickling and one for fresh) and took them home with intention to pickle ’em.

I don’t can, in the sense of hot water and headroom and sterilized jars. My grandmothers did. My mother has. I’m just a little intimidated by the whole botulism risk I think. And the heat. In the middle of summer. And the steam. I need an ice tea already!

Quick refrigerator pickles, though, are a totally different story. I’ve done them in the past (can’t find the recipe of course) and there are 1000s of recipes out on the internet. I’ve also done pickled shallots with much success (on a spicy lamb burger with greek yogurt OMG sounds like another blog post, eh?), but I was aiming for something sweeter, more like a bread-and-butter pickle, but without the jaw achingly sweetness. This brine struck that balance … sweet, but not too sweet … sour, but not too sour … salty, but not too salty!

I started these off in the morning before work and had serviceable pickles for dinner. They continued to percolate and mellow over the next day or so. Use within about 3 weeks I’m guessing.

SAMSUNG SAMSUNG SAMSUNG

Quick Refrigerator Sweet Pickles

4-6 very firm smallish cucumbers
2 cups distilled white vinegar
1 cup sugar
1 tablespoon kosher salt
2 tablespoons pickling spice (bay, pepper, mustard, …)

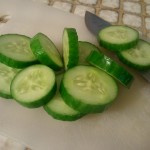
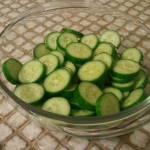
Slice your cucumber into rounds about 1/4″ thick. Place them in a large heat-proof glass bowl.
SAMSUNG
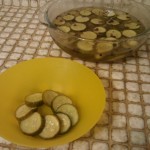
Combine the vinegar, sugar, salt, and pickling spice in a small saucepan and bring to a boil. Pour the brine over the cucumber slices and stir to ensure all the slices are submerged. Cover. Allow to cool on the countertop. Refrigerate. Keep refrigerated under cover for up to 3 weeks. Discard if you start to get off smells or colors!


I especially like them with peanut-butter-filled pretzels. Peanut butter and pickles are a match made in heaven. You know, I bet these would taste amazing deep-fried! Hmmmm … do I sense yet another post coming up ?

SAMSUNG

SAMSUNG

A Margarita Inspired Quick Spritzer

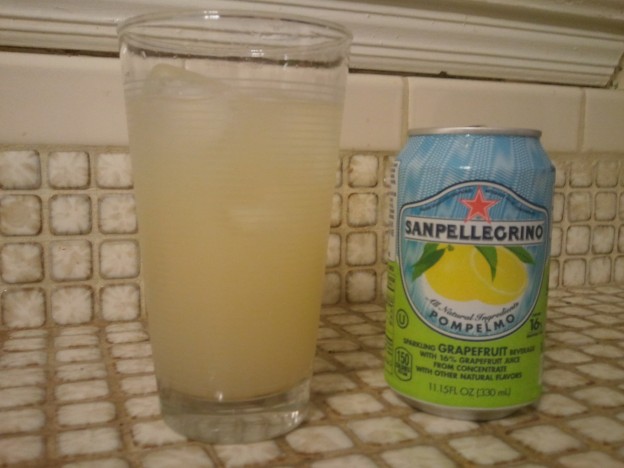
So I’ve already posted a couple of quick recipes using San Pellegrino Sparkling Fruit Beverages. My local grocery store had the grapefruit version on sale, so I picked some up thinking I’d try out a new cocktail on the Culinary Guinea Pig. He’s very fond of margaritas (on the rocks no salt or one of my frozen ones), and more generally fond of tequila, so I thought I’d try to create one more to his palate. It is definitely reminiscent of a margarita, but lighter, and the grapefruit adds a little something-something. Definitely one you should add to your repertoire!

Pompelmo SpritzerSAMSUNG
Serves 1

3 tablespoons tequila
1 tablespoon orange liqueur
Splash of lime juice
1/2 can of San Pelligrino Pompelmo Sparkling Fruit Beverage (not quite 3/4 cup)

Fill a large glass to the brim with ice. Add liquors and lime juice, then top with the sparkling drink. Stir gently to combine. Consume.

****

If I were using vodka instead of tequila, I’d probably use 3 parts Pompelmo to 1 part vodka.

Afterthought: this soda it is DELISH all on its own. So don’t think you **have** to add alcohol!

[photo: Casey Tantum]

Guest Post: Oreo Cookies and Cream Cake

[photo: Casey Tantum]

Julie says: If preference towards a type of food has anything to do with the perceived age and maturity level of an individual, then consider me a nine year old.  Funfetti is my cake flavor of choice, and I consider ice cream to be a major food group of its own, right there on the pyramid between dairy and protein.  With this said, you must understand the overwhelming feeling of excitement I experienced when I came across a recipe for a cake which not only looks like an Oreo, but tastes like an Oreo at the same time.  Dreams really can come true.

With that being said, when a coworker’s birthday just so happened to come the same week as the birth of the Royal Baby, this called for a celebration… and an excuse for me to make one of my favorite treats.  Besides, what screams royalty more than a cake made out of Oreos?

Now allow me first to read your mind and answer all of your questions ahead of time:

Q: It’s still beach season and I’m allergic to fun.  Is this cake healthy?
A: This cake is quite healthy, providing you with your daily dose of both Vitamin sugar and Vitamin whipped cream.

Q: Will I still be able to dunk my Oreo cake in a glass of milk?
A: An Oreo Cake, unlike your typical Oreo cookie, is too large to dunk into a standard milk glass, so cake dunking is not recommended.  However, the cake is quite rich so I would suggest having a glass of milk nearby.

Oreo Cookies and Cream Cake
Courtesy of Julie Giffin (Julie.Giffin@gmail.com)

1 Box white cake mix
Eggs, water and oil as called for on the box
15 Oreos, crushed

1 8-ounce package cream cheese, softened
1 16-ounce box powdered sugar
1 8-ounce container Cool whip, room temperature
15 Oreos, crushed
1/4 teaspoon pure vanilla extract

Cake: Grease and flour two 8″ pans.  Prepare cake batter according to package directions (or your own recipe) and set aside.  Put 15 Oreos into a Ziploc bag and smash yourself into oblivion until you have a bag of delicious chocolately crumbs. Stir the crushed Oreos into the batter before dividing between the two prepared pans.  Bake as directed on box or in recipe.  Remove cake layers from oven and allow to cool completely on cooling rack.

Frosting: In mixer, cream the cream cheese and sugar. Add vanilla, mix well, and stir in Cool whip by hand (do not beat it in or your frosting will turn out runny). Mix well. Fold in the remaining 15 crushed Oreos until well blended.  Keep in mind that you’ll have a fairly lumpy icing, but it adds to the fun. Frost cooled cake and refrigerate cake until ready to serve and refrigerate any leftovers.

Chef’s Secret: Use remaining Oreos to decorate the top of the cake by splitting in half and arranging on the top of the cake, chocolate side facing up.  OR you could always eat them.  The cake is beautiful on its own and you deserve it.

SAMSUNG

 *****

Michelle says: Now, I make a decent cake/cupcake myself, so I can be a little jaded. And picky. But this cake just blew my skirt up — it really is THAT good. So of course I begged her to write a guest blog and reveal her secret recipe!

SAMSUNG

Berrylicious Sangria

So peaches are still around and still luscious. The NJ blueberries are still delightfully plump (kinda like me?). And someone gave us some REALLY juicy cherries. So I threw together another summery sangria. I am REALLY sold on the spice-in-simple-syrup as a way to flavor sangria. Wait until winter, when I amp up the spice level in red wine with winter fruit!

Berrylicious Sangria
Serves 4

SAMSUNG2 – 4 tablespoons sugar
1/3 cup boiling water
1 cinnamon stick
1 star anise
3 cloves
1 ripe yet firm peach, peel left on
1/2 cup fresh blueberries
1/2 cup fresh sweet cherries, cut in half and pitted
1/2 cup blackberry brandy
1 750 ml bottle dry prosecco, chilled

Dissolve the sugar in the boiling water (I used my trusty 2 cup Pyrex measuring cup). Add the cinnamon stick, star anise, and cloves and let set on the counter to infuse. Meanwhile, thinly slice the peach and put those, the blueberries, and the cherries in the pitcher. Pour the brandy over the fruit and stir. Remove the cloves and then pour the cooled spiced sugar syrup over the fruit and stir (I like to leave the cinnamon stick and star anise in to continue infusing). Refrigerate, ideally for several hours. Just before serving, add the chilled wine and stir. Serve over ice. Garnish with a peach slice.

SAMSUNG SAMSUNG

SAMSUNG

Pork-Palooza

I’m going to caveat upfront — this post really doesn’t contain a recipe. Because smoking a pork butt (the butt of the shoulder) is a PROCESS. But if you have 8 – 10 hours to hang out some weekend afternoon, you WILL be rewarded with sweet porky goodness at the end, with plenty to share.

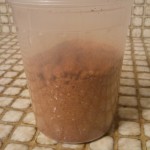
In our house, all good barbecue starts with a rub. There are many fine commercial rubs. Penzey’s makes several and Nick’s makes a good one. So we’ve always got some around, but we do find they tend a little saltier than we like. So most of the time, we make our own. I don’t have exact proportions, but the basic rub for our pork tends to contain, in roughly descending quantities:

  • SAMSUNGBrown sugar (light and/or dark, depending on what’s in the house)
  • Smoked Spanish Paprika
  • Salt
  • Ground black pepper
  • Garlic Powder
  • Onion Powder
  • Ground cumin
  • Ground Chipotle or Cayenne

SAMSUNG


Taste it for balance. Sweet should be at the forefront, with a hint of salt and smoky. Should finish a little spicy from the hot peppers. You can always cut it with a little more brown sugar or paprika if the salt or heat is too dominant.


SAMSUNG

Don’t worry if you make more than you think you need — as long as you don’t cross-contaminate with the raw meat, it will keep for a while in an airtight container. If you accidentally cross-contaminate (you know, stick your porky hand IN the container), then either use it all or toss it out. Don’t even THINK about saving it, even in the fridge, for another time.


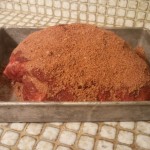
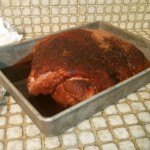
We like to apply the rub to our butt (stop giggling!!) the night before. Cover with foil and refrigerate overnight. Just for reference, this was about 7 pounds. Here’s the befores (11pm) and after (9a):

SAMSUNG SAMSUNG SAMSUNG

The next morning, Keith configured our Big Green Egg for indirect grilling with a plate setter, aiming for 225F to 250F. We put the meat on around 9a. Don’t waste the juicy stuff in the bottom of the night pan — pour that over your butt!

SAMSUNGSo now you get to sit around and watch the ballgame. Maybe do a little shopping on Amazon. Mow the lawn. About once an hour, take a peek at your dome temperature, adjusting your upper and lower vents as needed to keep it between 225 and 250. Ours sat around 250 for most of the smoke. There is NO reason to open the lid of the smoker!!

SAMSUNG


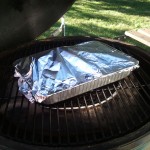
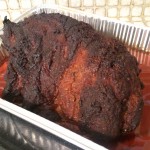
Around 4pm, Keith transferred the meat to a disposable aluminum pan. He added about 1″ of apple juice to that pan, covered it all with foil, and returned it to the grill at the same 225F – 250F. This is called “wrapping” and ALL the competition barbecue people do it!


We are converts to wrapping for the last 1/2 or 1/3 of the cooktime. We do it with our brisket and we do it with our ribs. It keeps you from over-smoking your meat, it lets you get a little moisture or flavor on the meat with no risk of burning, and it cuts the cooktime down because the meat is almost “braising” or “steaming” at the end. Downside — your bark might soften up some, but if you get good color/carmelization on there early on, you’ll be fine.

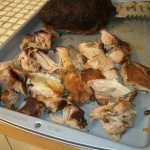
Around 6:30p, we checked the internal temperature. Right at 200. We like to take pork butt to 195F – 200F, so we probably coulda pulled it at 6p, but Keith was still mowing the lawn (pork butt is pretty forgiving, especially if wrapped). We pulled the meat, let it rest about 15 minutes, then started pulling:

SAMSUNG SAMSUNG SAMSUNG

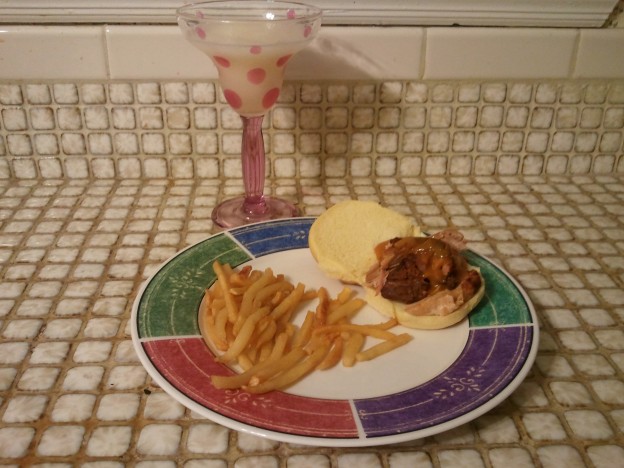
We like to serve it on soft potato rolls with a selection of barbecue sauces. Right now we are obsessed with two from Harris Teeter — a mustard based and a vinegar based. Don’t forget one of my fabulous frozen margaritas!

SAMSUNG

Party-Friendly Frozen Margaritas

So, a few years back, I perfected my frozen margarita recipe. The Internet had a multitude of recipes referencing frozen limeade, but the booze proportions were all over the place. So I tinkered and tweaked and came up with a balanced booze-to-limeade ratio that’s easy to remember. My husband could drink these all summer long.

These are a huge hit at large gatherings (even the occasional office kitchen after hours, depending on your employer). You can easily crank out pitcher after pitcher, just make sure to have lots of ice and to use smaller cups :)

SAMSUNGFrozen Margaritas
Serves 4 – 8

6 ounces frozen limeade concentrate
3/4 cup white tequila
1/4 cup orange liqueur
A bunch of ice

Scoop the still-frozen limeade into the blender. Add the tequila and orange liqueur. Add ice to ~40-ounce line. Whir on highest speed until a homogenous consistency. Serve immediately.

SAMSUNG SAMSUNG

 Variations:

  • If you have frozen fruit in the freezer, throw it in before you add the ice. Maybe a cup or so? Tru frozen mango or frozen berries (strawberries, blackberries, raspberries, or a mixture). Surprisingly good: about a cup of canned crushed pineapple, partially drained. Blueberries don’t work so well — the skins separate from the pulp — save those for yogurt smoothies.
  • If you have fruit liqueurs around, use 1/8 cup of the fruit liqueur and 1/8 cup of the orange liqueur. Pomegranate liqueur or creme de cassis are nice and tart and add a lovely color.

Ingredient Notes:

  • I like Minute-Maid limeade. It typically comes in a 12-oz can, so I use half of a can per pitcher.
  • I prefer 1800 Silver Tequila. It’s middle-of-the-road price-wise and makes a fine classic margarita.
  • I like to use La Belle Orange, a French orange and cognac liqueur. Again, middle-of-the-road price-wise. You could use triple sec if that’s what you have around. I probably wouldn’t use the 100-year old Grand Marnier — this is kind of a low-brow cocktail :)

Equipment Note:

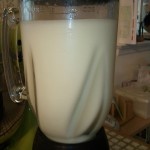
These proportions are for a typical home blender. I think the pictured one is 48 ounce and my other one is a 40 ounce. If your blender is considerably larger or smaller, you need to adjust your proportions. A couple of ounces larger or smaller shouldn’t make a difference.

SAMSUNG

Sometimes You Feel Like a Nut!

My all-time favorite cookie is the classic Toll House Chocolate Chip Cookie. Real butter, real eggs, Nestle semi-sweet morsels. Nuts optional. It’s the cookie of my childhood and my go-to cookie today. I’ll experiment with the mix-ins, maybe bake as bars rather than individual cookies (awfully cute in a heart-shaped cake pan), but sometimes I just want that classic favorite.

So one of my Facebook friends shared a link to Handle the Heat, where the blogger took the classic Toll House Chocolate Chip Cookie recipe as a “control recipe” and then made a series of batches where she tweaked a single element in the recipe, LIKE A SCIENCE EXPERIMENT, to see what happened. I was totally enthralled by the post! Two changes that caught my eye were the use of equal parts baking powder and and baking soda (rather than just baking soda) and the use of melted butter (rather than butter softened to cool room temperature).

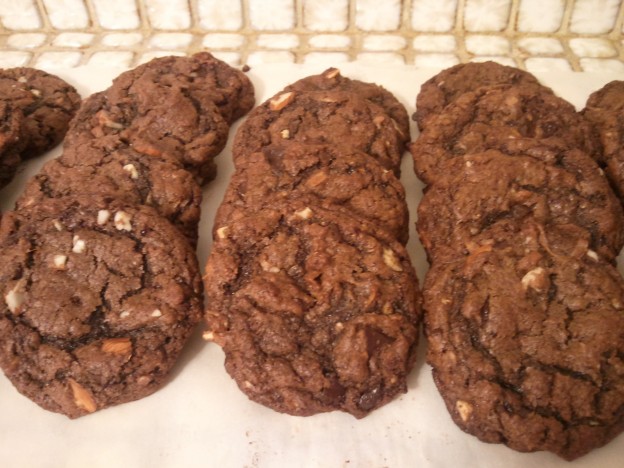
Independently, I’ve been thinking about a “Almond Joy” cookie — something with chocolate, almonds, and coconut (duh). But I didn’t want to just throw these into a blonde cookie base. I’ve got some recipes for a chocolate cookie base, but most called for melting baking chocolate or chocolate chips — just too fussy. I have a tasty mocha cookie base that’s based on the Toll House recipe — but it’s not as chocolatey as I imagined for this cookie. So, taking a little inspiration from Tessa, I tweaked this classic cookie base and got the chocolatey depth I wanted, the crisp edges I adore, and a moist center chockfull of coconut and almond chewiness.

Sometimes You Feel Like a Nut Cookies
Makes about 2 dozen cookies

SAMSUNG1 stick unsalted butter, melted and cooled to room temperature
1 cup plus 2 tablespoons unbleached all-purpose flour
1/2 teaspoon baking soda
1/2 teaspoon salt
1/4 cup unsweetened baking cocoa
1/4 cup plus 2 tablespoons granulated sugar
1/4 cup plus 2 tablespoons packed brown sugar
1 teaspoon vanilla
1 large egg
1 cup rough-chopped dark chocolate (or semi-sweet chocolate chips)
1/2 cup sliced almonds
1/2 cup sweetened shredded coconut

Preheat oven to 375F. Line two baking sheets with parchment paper.

Gently melt the butter. I like to use a 2-cup Pyrex cup in the microwave: 30 seconds @ 50% power, swirl, 20 seconds @ 40% power, remove. Allow to cool to room temperature.

Whisk together the flour, baking soda, salt, and cocoa in a medium bowl. Set aside.

Pour the butter over the sugars in the bowl of a stand mixer fitted with the paddle attachment. Beat on low for about a minute. Scrape the paddle and sides, then let the butter and sugar hang out for about five minutes to better dissolve. Then, beat on medium-low for a couple of minutes until fully mixed. [NOTE: You could probably do this by hand with a wooden spoon and good arm muscles]

Add the egg, mix until fully incorporated. Add the vanilla, mix until fully incorporated.

Add the dry ingredients slowly with mixer on low (I added in three increments), scraping frequently. Don’t overmix! Add the chocolate, almonds, and coconut. Mix with the mixer about 3 rotations of the bowl — then stop and finish by hand.

SAMSUNGUse a cookie scoop (mine is a generous tablespoon — probably about four teaspoons) to place eight scoops on a parchment-line cookie sheet. You need some room for spread. Put ONE cookie sheet in the oven, cook 6 minutes (set the timer!), rotate the pan, and cook for another 3 to 4 minutes.


SAMSUNGPull when the cookies look a bit underdone — there will be carryover cooking as you allow them to cool on the cookie sheet before moving to waxed paper on your countertop to fully cool.

I got 27 cookies out of this recipe, even permitting the cook a few bites of dough (raw egg be damned!).


Serve with ice cold milk, of course!

SAMSUNG SAMSUNG SAMSUNG

SAMSUNG

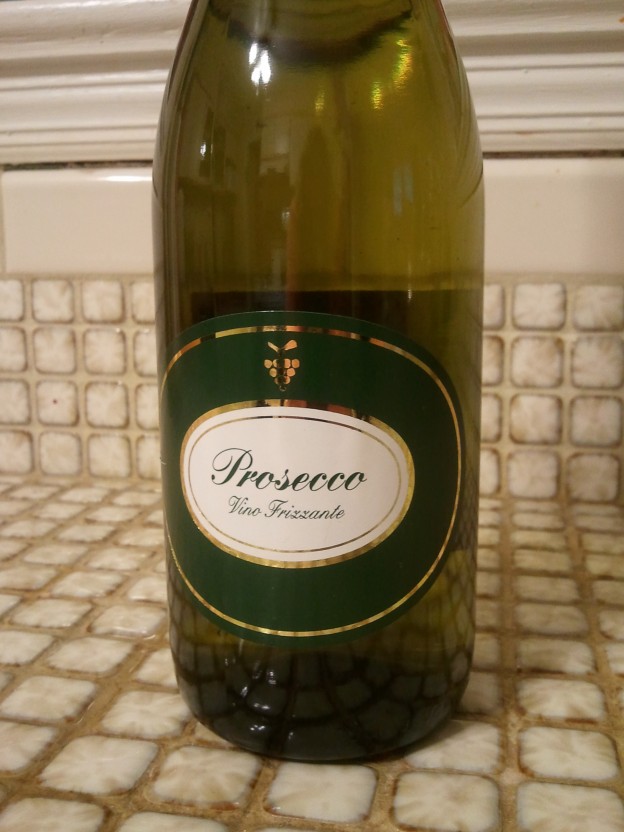
Wine Find – TJ’s NV Prosecco

This is my ORIGINAL Tuesday Night Wine … a non-vintage Prosecco from Trader Joe’s ringing up at $6.99/bottle. I think it’s been that price for the 10 years we’ve been drinking it! It’s a versatile wine with enough body and acidity to hold up to hearty dishes, such as pork or steak, and is especially good with spicy Asian dishes. But also quite lovely with fish and seafood. I also use it in sangria. We buy it buy the case because we drink at least one bottle a week — it goes with so much that we eat. It’s also my standard house-warming or Happy Birthday gift :)

Prosecco is an Italian sparkling wine. My experience is that it is a tad less fizzy than Champagne or domestic sparkling wines made in the méthode champenoise. It’s on the dry (not sweet) side, but if I have a guest that prefers a sweeter wine, I float a little creme de cassis or other sweet fruit liqueur in it.

If you have a Trader Joe’s that sells wine in your area — definitely give this a try.

Standard caveat: This is a personal recommendation. Trader Joe’s doesn’t know I exist and has provided neither product nor compensation for this endorsement. In fact, they’ll probably sue me if this ever gets in a search engine.

SAMSUNG

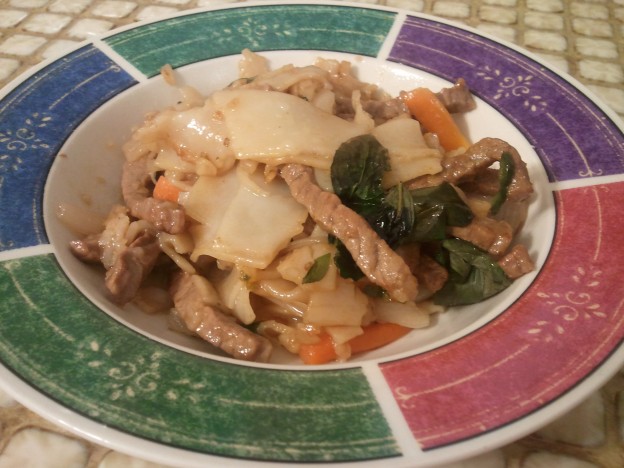
More Easy Thai at Home (Drunken Noodles)

So another dish I learned to make in cooking class was Drunken Noodles. Now, if your Thai grandmother was making both Garlic Basil Chicken and Drunken Noodles, I’m sure the two dishes would be totally different from each other. But with my foggy memory and American palate, well, my versions are VERY similar. One has fish sauce and is served over rice, the other has carrots and noodles, but I’m not sure I could name which was which in a blind taste test.

NOTE: If you have a Thai grandmother who can shame me into truly appreciating the differences, please contact me soonest because I WANT to be in that blind taste test!

SAMSUNG SAMSUNG

Drunken Noodles
Serves 2+, but I usually double this to serve 4+

Typically when I make this, I make about 1/3 as a kid-approved version and 2/3 as a spicy adult version, which you will see in the pictures. So I will try to explain that as I go.

3 – 4 garlic cloves, minced
3 – 5 Thai chile peppers, minced fine
3/4 lb lean beef, sliced thin (can use chicken or pork)
12 ounce package of rice noodle sheet, cut into wide noodles
2 – 3 tablespoons canola oil
3 teaspoons granulated sugar, divided
2 1/2 teaspoons seasoning soy sauce, divided
3 tablespoons oyster sauce, divided
1 medium-sized white or yellow onion, sliced thin (root to stem) [I used a giant shallot this time since I had no onion!]
A large handful of baby carrots, cut into matchsticks
A bunch of Thai basil leaves

Your garlic, chiles, beef, noodles, onion, and carrots should be prepared before you ever turn on the stove. Have your condiments setting to the side with lids off.

Heat both a small saute pan (I use an 8″ omelet pan) and a medium saute pan (I use a 10″ fry pan) over medium to medium-high heat. Swirl about a tablespoon of canola oil in the small pan and a tablespoon or two of canola oil in the large pan.

Turn on your exhaust fan (trust me). Add 1/3 of the garlic to the small pan. Add the remaining garlic and the chiles to the large pan. Adjust the heat if needed — you are going to cook these just until fragrant. Add 1/3 of the beef to the small pan and 2/3 of the beef to the large pan — stir them around to coat the beef in the garlic and the oil. Cook the beef, stirring occasionally, until it’s about 1/2 done (a little pink is okay).

Add about 1/3 of the noodles to the small pan and 2/3 of the noodles to the large pan — stir them around to coat the noodles in the meat juice and oil. Don’t play with them too much — they tend to fall apart — and it’s okay if they caramelize a little — some color is okay.

Sprinkle 1 to 1 1/2 teaspoons of sugar, 1/2 teaspoon seasoning soy sauce, and 1 tablespoon oyster sauce over the beef in the small pan and stir.

Sprinkle 1 – 2 teaspoons of sugar, 2 teaspoons seasoning soy sauce, and 2 tablespoons oyster sauce over the beef in the large pan and stir.

Put a few slices of onion in the small pan (the kids will pick it out probably) and the remainder of the onion in the large pan. Put about 1/3 of the carrots in the small pan and the remainder in the large pan.

Turn the heat down a bit and cook a few minutes until the vegetables softens but are still tender-crisp. Sometimes I will put a lid on the pan to reduce evaporation while they cook a bit.

Toss in the basil leaves and stir until they wilt a bit. Serve immediately.

SAMSUNG SAMSUNG